Popcorn ceilings, also commonly known as textured ceilings, were a popular design choice due to their ability to hide imperfections. However, these textured surfaces have become less desirable in recent years, leading many homeowners to consider painting their popcorn ceilings.
Painting a popcorn ceiling can give any space a fresh and updated look while maintaining its textured charm. Here, we will provide a comprehensive guide on effectively painting a popcorn ceiling. However, before we go into that, here’s an overview of popcorn ceilings.
Popcorn ceilings: A classic yet disputed design
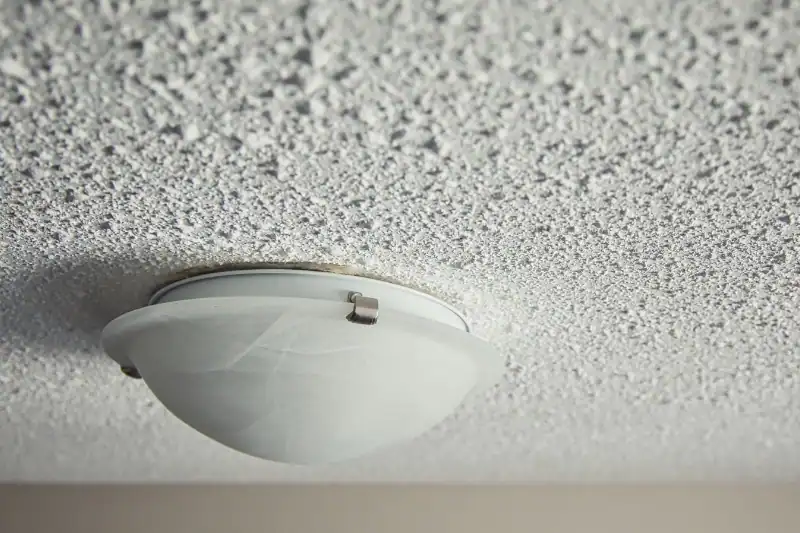
Popcorn ceilings were a trendy home design element in the mid-20th century. The bumpy, rough texture resembling popcorn kernels brought visual interest to plain ceilings. However, as time passed, these ceilings fell out of favor, and many homeowners now consider them outdated and unsightly.
Here’s a brief overview of the history, pros and cons, removal techniques, and alternative options for popcorn ceilings:
History of popcorn ceilings
Popcorn ceilings gained popularity in the 1950s and peaked in the 1970s, mainly due to their functional benefits, such as soundproofing and hiding imperfections. The acoustic texture helped to absorb sound, reducing echoes in rooms. Additionally, the textured finish masked flaws like cracks and uneven surfaces, making them a popular choice among builders and homeowners.
Pros of popcorn ceilings
- Soundproofing: The texture of popcorn ceilings has excellent sound-absorbing properties, which can create a quieter and more peaceful living environment, especially in apartments or other shared spaces.
- Affordable: Popcorn ceilings are relatively inexpensive compared to different decorative finishes. They require fewer labor and materials, making them a cost-effective alternative for homeowners on a strict budget.
- Hiding Imperfections: The texture effectively camouflages any surface imperfections, such as cracks or uneven finishes, reducing the need for extensive repairs.
Cons of popcorn ceilings
- Difficult to Clean: The rough texture of popcorn ceilings makes cleaning or removing dust and cobwebs challenging. Over time, this can lead to an accumulation of allergens or unsightly stains.
- Outdated Aesthetic: Popcorn ceilings are a relic of the past, and their appearance can make a room feel dated. Many homeowners prefer a smoother, more modern look for their ceilings.
- Health Concerns: Popcorn ceilings installed before the late 1970s often contain asbestos. Disturbing these ceilings during removal or renovation can release harmful asbestos chemicals into the air, posing a severe health risk.
Removing popcorn ceilings
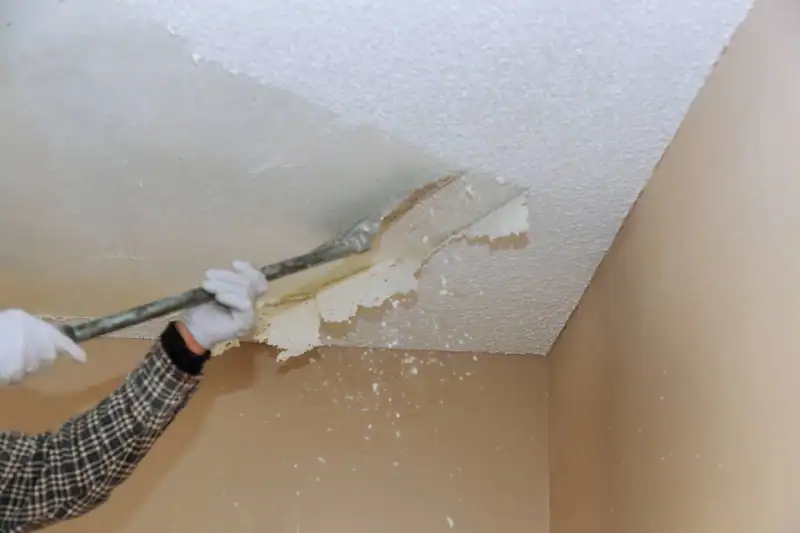
Removing popcorn ceilings can be a troublesome and time-consuming process. If asbestos is present, it should only be handled by a professional asbestos abatement company. For non-asbestos ceilings, here are a few methods:
- Wet Scrape: Moistening the texture with water makes it easier to scrape off using a wide putty knife or scraper. This method minimizes dust and prevents the texture from becoming airborne.
- Covering with Drywall: Rather than removing the texture, some homeowners opt to cover popcorn ceilings with a layer of sheetrock or drywall. This creates a smooth surface without the need for removal.
- Ceiling Paneling: Another option is to install ceiling panels, such as pressed tin tiles or acoustic panels. These coverings can add visual interest and improve the room’s acoustics while concealing the popcorn texture.
Alternative ceiling finishes
If you are not a fan of popcorn ceilings, there are several alternative options to consider:
- Smooth Ceilings: A smooth ceiling finish offers a clean and contemporary look. Skim coating or sanding down existing popcorn texture followed by a coat of primer and paint can result in a sleek, modern ceiling surface.
- Textured Paint: If you appreciate the visual interest of texture but dislike the popcorn style, textured paint can offer a compromise. This technique creates various patterns and textures on the ceiling while avoiding the outdated popcorn appearance.
- Exposed Beams: Embrace a rustic or industrial look by exposing ceiling beams, either natural wood or painted. This option adds character to a space and eliminates the need for any ceiling finish.
Despite their declining popularity, popcorn ceilings remain a part of many homes. While they possess certain functional benefits, their outdated and challenging-to-maintain nature has led homeowners to explore alternatives. The decision to keep or remove popcorn ceilings ultimately depends on personal tastes and the time and budget available for renovation.
Whether you choose to renovate or retain these textured ceilings, the most crucial consideration is to ensure the protection and well-being of everyone in the home. With that said, let us go deeper into how you can paint popcorn ceilings.
How to paint popcorn ceiling
Painting a popcorn ceiling can be grouped into four stages: preparation, cleaning, priming, and painting. Here’s what you should know about each step:
Preparation
- Gather the necessary tools and materials: Paint roller with an extended handle, paint tray, high-quality paint (latex or oil-based), paintbrush, drop cloths or plastic sheets, painter’s tape, ladder or step stool, safety goggles and dust mask, and stain-blocking primer (if necessary).
- Clear the room: Remove furniture, decorations, and light fixtures from the room or enfold them with drop cloths or plastic film to keep them secure from paint splatters.
- Cover the floor and walls: Spread drop cloths or plastic sheets to catch drips or spills. Use painter’s tape to secure them in place. Also, cover the walls with plastic sheets or masking paper to prevent accidental paint splatters.
- Protect yourself: Use a dust mask and safety goggles to protect your eyes and respiratory system from potential dust and debris.
Cleaning
- Remove dust and debris: Use a vacuum cleaner with a brush or a duster to remove any loose dust and debris from the popcorn ceiling. It is essential to start with a clean surface to ensure paint adherence.
- Repair any damages: Inspect the ceiling for cracks, holes, or damaged areas. Use a patching mixture and a putty knife to repair these imperfections. Allow the mix to dry thoroughly before proceeding.
Priming
- Prime the ceiling (if necessary): If the popcorn texture is stained or discolored or if you’re changing the paint color drastically, it is recommended to use a stain-blocking primer. Apply the primer with a paint roller, choosing a roller with a thick nap to penetrate the textured surface. Let the primer dry in compliance with the manufacturer’s instructions.
Painting
- Choose the paint: Select a high-quality paint that matches your desired color and finish. Latex paints are commonly used for painting popcorn ceilings.
- Cut in the edges: Use a paintbrush to cut carefully along the edges of the ceiling. This includes the corners and areas near light fixtures or air vents. Take time and ensure a clean line between the ceiling and the walls.
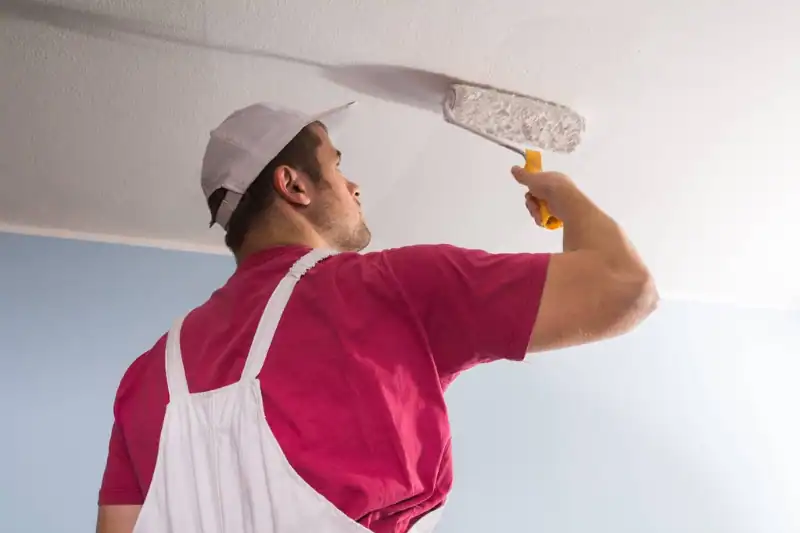
- Paint the rest of the ceiling: Dip the paint roller into the paint tray, removing any excess paint. Roll the paint onto the popcorn texture in small sections starting from one corner of the ceiling. Apply even pressure and move consistently to achieve a uniform coating. Work your way across the room, overlapping each section slightly.
- Apply a second coat (if necessary): Let the first coat dry completely, following the paint manufacturer’s instructions. Inspect the ceiling for any uneven areas or missed spots. If needed, apply a second coat to ensure complete coverage.
Painting your popcorn ceiling
Painting your popcorn ceiling can be daunting, so it should only be a DIY project if you already have the necessary skills. By following this step-by-step guide, you can refresh your space, giving it a modern and updated appearance while preserving the unique charm of the popcorn texture.
However, take the necessary precautions, choose high-quality interior paint, and allow enough drying time between coats. For the best results, be sure to consult professional painters.
By collaborating with professional painters, you can gain valuable painting insights and recommendations tailored to your needs, ensuring that the project aligns with your vision and expectations. Their attention to detail and commitment to excellence enhance your space’s aesthetics and contribute to its overall value and appeal.

